Pull Request Previews with Rails, Cloud Run, and GitHub Actions
If you work in a larger organization, chances are you have access to some sort of staging environment where you can preview work that is currently in progress. Staging environments can be immensely useful to get early feedback, be it from QA or other departments, which can speed up the development of new features significantly.
Several large platforms such as Netlify, Vercel, or Serverless offer preview deploys of one sort or another. There are also paid services such as Pullpreview, which runs on AWS and allows one-click deploys for GitHub pull requests.
We are going to be building something similar, but for a simple Ruby on Rails application, and using Google Cloud Run. We are going to use GitHub Actions to do the actual deployment and continuous integration part. In the end, we want a solution that can accomplish the following:
- An isolated preview environment is created for each pull request. That environment is easily accessible using a direct link.
- On pushing changes to the pull request, the preview should automatically update.
- The preview environment should be fast to set up and tear down. No manual intervention should be necessary at any point.
To showcase how we can build such a solution we’ll do the following:
- Create a simple Rails application for demo purposes.
- Build an application Docker image.
- Create a Cloud Run Service that runs our application container.
- Set up a GitHub action that automatically builds our application container and deploys it to Google Cloud Run
This is a bit of a longer post, so if you are more of a TL;DR type head over to this repository to check out the complete solution.
This guide is intended for people who are already somewhat experienced with Rails, Docker and the Google Cloud SDK. I reference documentation where possible, but you will get the most out of this guide if you have a basic understanding of the involved technologies already. This is not a tutorial on how to work with Ruby on Rails or Docker or Google Cloud.
Application Setup
While this guide focuses on the whole deploying-a-pull-request part, we are going to need a simple application that we can actually deploy. We can keep it simple. How about an application that allows you to store some books? Perfect ![]()
Make sure you have a recent version of Ruby and Yarn installed, then create the bookstore application. We’ll keep it minimal here, all we want is to store some books.
rails new bookstore \
  --database=postgresql \
  --webpack\
  --skip-active-storage \
  --skip-action-cable \
  --skip-system-test \
  --skip-action-text \
  --skip-action-mailer
To make it easier for us to configure our application down the line, let’s also add the dotenv gem to our Gemfile and run bundle install.
gem 'dotenv-rails'
Because we will deploy our application on Cloud Run, we’ll have to dockerize it sooner or later. To make it easier for us to test our process locally - trust me, this is quite handy - we’ll create a docker-compose file for our application and it’s dependencies. Once you have Docker and Docker Compose set up, let’s create our docker-compose.yml and add Postgres as a dependency.
version: "3"
services:
  bookstore-db:
    image: postgres
    volumes:
      - db-data:/var/lib/postgresql/data
    ports:
      - 5432:5432
    environment:
      postgres_password: bookstore
      postgres_user: bookstore

volumes:
  db-data: ~
Then start the database container.
docker-compose up -d
So far so good. Our bookstore doesn’t do anything yet. We’ll want to create, edit and delete books. But first, we have to make sure the application can connect to our Database. Open config/database.yml and update it with the following contents:
default: &default
  adapter: postgresql
  encoding: unicode
  host: <%= ENV['DATABASE_HOST'] %>
  username: <%= ENV['DATABASE_USERNAME'] %>
  password: <%= ENV['DATABASE_PASSWORD'] %>
  pool: <%= ENV.fetch("RAILS_MAX_THREADS") { 5 } %>

development:
  <<: *default
  database: bookstore_development

test:
  <<: *default
  database: bookstore_test

production:
  <<: *default
  database: "bookstore_production"
Next, create a .env file for dotenv to load and fill it with credentials matching what is in your docker-compose.yml. For now, let’s have the database be located at localhost, but we’ll change that soon.
DATABASE_HOST=localhost
DATABASE_USERNAME=bookstore
DATABASE_PASSWORD=bookstore
If we did well so far we should be able to set up our database and start the server.
rails db:setup
rails server
You should be able to see the application running on http://localhost:3000. Next, let’s create some books, migrate our data and restart the rails server.
rails g scaffold books title:string author:string publication_year:integer
rails db:migrate
rails server
We can now add some books on http://localhost:3000/books. As a final tweak, let’s update the config/routes.rb file so we can save ourselves from having to append /books to our URLs in the future.
Rails.application.routes.draw do
  root 'books#index'
  resources :books
end
That’s good enough for a basic app I’d say. Let’s get started on dockerizing it.
Dockerizing the Bookstore
We’ll be running our application in production mode within its container, so let’s prepare for that by setting up a secret key base for production.
rails secret
rails credentials:edit --environment production
secret_key_base: <your-secret-goes-here>
When editing your credentials for the first time take note of the generated master key. You can always check config/credentials/production.key later though. Do not commit this file to your version control.
To create a Docker image for an application, you need a Dockerfile. So let’s create that. Here’s one to get you started:
FROM ruby:3.0-slim as cache

RUN apt-get update -qq && apt-get install -y \
  curl \
  build-essential \
  libpq-dev \
  postgresql-client
RUN curl -sL https://deb.nodesource.com/setup_14.x | bash -

RUN curl -sL https://dl.yarnpkg.com/debian/pubkey.gpg | apt-key add - && \
  echo "deb https://dl.yarnpkg.com/debian/ stable main" | tee /etc/apt/sources.list.d/yarn.list

RUN apt-get update -qq && apt-get install -y yarn

WORKDIR /bookstore
COPY Gemfile /bookstore/Gemfile
COPY Gemfile.lock /bookstore/Gemfile.lock
COPY package.json /bookstore/package.json
COPY yarn.lock /bookstore/yarn.lock

RUN bundle install --without development
RUN yarn install

FROM cache
COPY . /bookstore

ARG DATABASE_HOST=db
ARG RAILS_ENV=production

ENV DATABASE_HOST=$DATABASE_HOST
ENV RAILS_ENV=$RAILS_ENV

ENV RAILS_LOG_TO_STDOUT=true
ENV RAILS_SERVE_STATIC_FILES=true

RUN bundle exec rails assets:precompile

COPY entrypoint.sh /usr/bin/
RUN chmod +x /usr/bin/entrypoint.sh
ENTRYPOINT ["entrypoint.sh"]

EXPOSE 3000

# Start the main process.
CMD ["rails", "server", "-b", "0.0.0.0"]
Adjust this to suit your needs. We set some particular environment variables.
RAILS_LOG_TO_STDOUT=true
RAILS_SERVE_STATIC_FILES=true
Most likely you would not set these in a ‘real’ application, but for demo purposes, letting Rails serve static assets simplifies the deployment process a lot, and logging to STDOUT makes debugging a lot easier when something goes awry.
You may have noticed that the Dockerfile references an entrypoint.sh file, so let’s create that as well.
#!/bin/bash

set -e

# Create the Rails production DB on the first run
bundle exec rails db:create

# Make sure we are using the most up to date
# database schema
bundle exec rails db:migrate

# Remove a potentially pre-existing server.pid for Rails.
rm -f /bookstore/tmp/pids/server.pid

# Then exec the container's main process (what's set as CMD in the Dockerfile).
exec "$@"
It is also a good idea to create a .dockerignore file - here is a sample - although this is not strictly necessary. With the Dockerfile complete, we should be able to build our bookstore image.
docker build -t bookstore .
If you try to run your container and access the bookstore application now, you’ll notice some errors due to the database container no longer being accessible.
To fix that while keeping things simple, let’s just move our bookstore image to the docker-compose.yml as well.
version: "3"
services:
  ...

  bookstore:
    build: .
    image: gcr.io/rails-gcloud-bookstore/bookstore
    ports:
      - 3000:3000
    environment:
      DATABASE_HOST: bookstore-db
      DATABASE_USERNAME: bookstore
      DATABASE_PASSWORD: bookstore
    depends_on:
      - bookstore-db

volumes:
  db-data: ~
Note the image name, as you’ll have to adjust it later. It has to match the name of your Google Cloud Project, which we’ll create when we push our image to the Google Cloud Registry.
Running docker-compose up now should build the bookstore application image and start the container. A production version of your application should now be accessible under http://localhost:3000.
If your container won’t start it can be helpful to connect to it using docker-compose run --entrypoint /bin/bash bookstore to verify the contents of environment variables or the presences of files within the container.
Set Up Google Cloud
Let’s recap. We built a simple Rails application - our trusty bookstore - and made sure we can build a production-ready Docker image for it. Now let’s set up the necessary Google Cloud infrastructure.
First things first. Make sure you have installed the Google Cloud SDK. Once you have it installed log in.
gcloud auth login
This guide uses Google Cloud SDK for convenience reasons. Copy-pasting a bunch of commands is just a lot easier than reproducing what’s shown on some screenshot. That being said, you can accomplish everything described thereafter using the Google Cloud Console. Pick your poison.
Let’s set up a new Google Cloud Project. I’ll name mine rails-gcloud-bookstore. You’ll likely have to pick a different one because project names must be unique. Then set the new project as default project.
gcloud projects create rails-gcloud-bookstore
gcloud config set project rails-gcloud-bookstore
Next, we’ll enable the Container Registry because that is where we are going to push our Docker image.
You’ll have to enable billing for your project, because storing containers is not free. Head over to Billing and set your billing account. You can find more information on billing in the official documentation. Do not worry, following this guide will cost you a couple of cents at the most 😉
The Cloud SDK provides a helpful Docker utility that makes it easy to push local images to the Google Container Registry, so let’s enable that.
gcloud services enable containerregistry.googleapis.com
gcloud components install docker-credential-gcr
gcloud auth configure-docker
Now you should be able to push your local image:
docker push gcr.io/rails-gcloud-bookstore/bookstore
This might take a while. Afterward, you can check that your image was indeed pushed by either running gcloud container images list or verifying the contents of the container registry in the Cloud Console.
Before we can run our application on Cloud Run, we’ll have to take care of setting up Postgres in the Cloud. We need a place to store our books after all.
Let’s set up a Cloud SQL instance and configure it. You can pick any of the available regions. For the remainder of the guide, I’m going with europe-north1 wherever a region needs to be specified.
gcloud sql instances create bookstore-db \
  --root-password="bookstore" \
  --database-version=POSTGRES_13 \
  --region=europe-north1 \
  --tier=db-f1-micro \
  --no-backup
gcloud sql users create bookstore --instance=bookstore-db --password='bookstore'
Cloud SQL instances are not publicly accessible without additional configuration. As such, there is no need to worry too much about picking a password for demo purposes. For production uses you should still pick a strong password.
Almost everything we need is in place. Let’s enable Cloud Run.
gcloud services enable run.googleapis.com
To make sure that your application can connect to the Cloud SQL instance we will need to set the necessary permissions. List all available service accounts and give the compute service account the Cloud SQL Client role. Google Cloud automatically uses this service account when running containers in Cloud Run.
gcloud iam service-accounts list
gcloud projects add-iam-policy-binding rails-gcloud-bookstore \
  --member serviceAccount:<projectid>[email protected] \
  --role roles/cloudsql.client
Now, let’s deploy the bookstore app.
Make sure that the environment variables match what you have configured previously. In particular, the database host variable should contain the SQL connection name, and the production key should match the key you got when setting up production credentials for the bookstore app previously. To find the SQL connection name you can run gcloud sql instances describe bookstore-db.
gcloud run deploy bookstore-preview \
  --image=gcr.io/rails-gcloud-bookstore/bookstore \
  --platform=managed \
  --port=3000 \
  --add-cloudsql-instances=rails-gcloud-bookstore:europe-north1:bookstore-db  \
  --set-env-vars DATABASE_HOST=/cloudsql/rails-gcloud-bookstore:europe-north1:bookstore-db \
  --set-env-vars DATABASE_USERNAME='bookstore' \
  --set-env-vars DATABASE_PASSWORD='bookstore' \
  --set-env-vars RAILS_PRODUCTION_KEY="your-production-master-key" \
  --region=europe-north1 \
  --allow-unauthenticated
If everything was successful running the deploy command should give you a link that you can visit to view your application running on Cloud Run ![]()
Creating the GitHub Action
We are almost there. Before we create our GitHub action that automates the deployment process we’ll need to create a Google Cloud service account that has the necessary roles to:
- Push our image to the Container Registry
- Deploy the image to Cloud Run
Run the following commands to create a service account and give it the permissions required.
gcloud iam service-accounts create \
  bookstore-build \
  --display-name="Bookstore Builder"
gcloud projects add-iam-policy-binding rails-gcloud-bookstore \
  --member serviceAccount:[email protected]  \
  --role roles/run.admin
gcloud projects add-iam-policy-binding rails-gcloud-bookstore \
  --member serviceAccount:[email protected]  \
  --role roles/storage.admin
gcloud projects add-iam-policy-binding rails-gcloud-bookstore \
  --member serviceAccount:[email protected]  \
  --role roles/iam.serviceAccountUser
Verify that all roles are set correctly either by running the following command or by checking the Cloud Console IAM section.
 gcloud projects get-iam-policy rails-gcloud-bookstore  \
  --flatten="bindings[].members" \
  --format='table(bindings.role)' \
  --filter="bindings.members:[email protected]"
To use this service account in the GitHub action download the service account key.
gcloud iam service-accounts keys create bookstore-build.json \
  --iam-account [email protected]
Make sure to not commit this file, as to not give other persons access to you Google Cloud Resources. If you did so by accident you can always remove the compromised key and recreate a new one on the service accounts page.
If you haven’t already create a new GitHub repository.
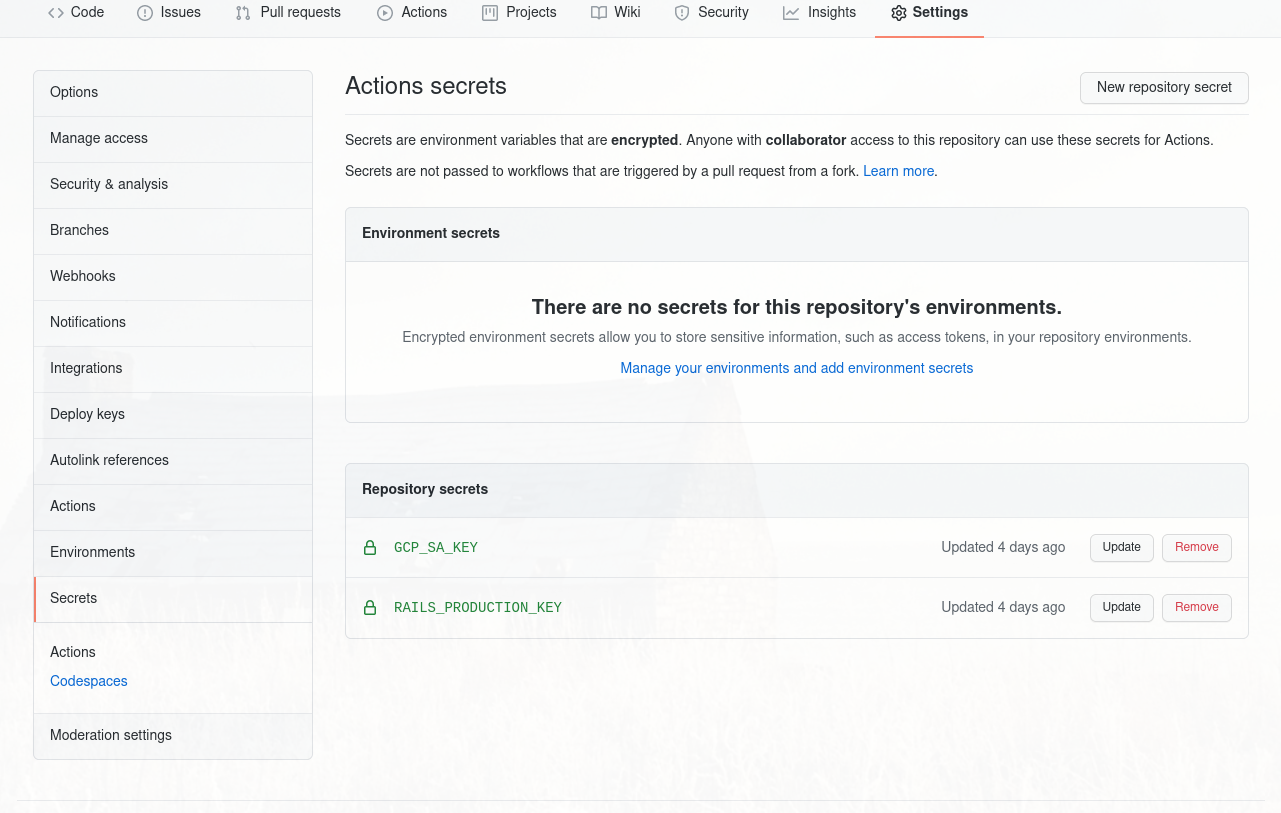
Copy the contents of the service account key file (yes, the entire content) and add them to your GitHub secrets as GCP_SA_KEY. While you are at it, also add your RAILS_PRODUCTION_KEY, because we’ll need that as well. Your action secrets page should look something like this after you are done.
Now let’s create a new workflow file. If you haven’t worked with GitHub actions before, you can learn more about them here.
You can create a GitHub action using the GitHub web interface, but we’ll use the command line as usual. In your bookstore repository create a new workflows folder.
mkdir -p .github/workflows
Create a workflow file in that new folder (I named mine preview.yml, but you can call it whatever you want), and let’s add the following content.
name: Preview

on:
  pull_request:
    branches:
      - "main"
    types: [synchronize, opened, reopened]

jobs:
  tests:
    runs-on: ubuntu-latest
    env:
      RAILS_ENV: test
      DATABASE_HOST: localhost
      DATABASE_USERNAME: bookstore
      DATABASE_PASSWORD: bookstore
    services:
      postgres:
        image: postgres:13
        env:
          POSTGRES_PASSWORD: bookstore
          POSTGRES_USER: bookstore
        ports:
          - 5432:5432

    steps:
      - uses: actions/checkout@v2
      - name: Set up Ruby
        uses: ruby/setup-ruby@v1
        with:
          ruby-version: 3.0
          bundler-cache: true
      - name: Set up Node
        uses: actions/setup-node@v1
        with:
          node-version: 14.9
      - name: Install dependencies
        run: |
          sudo apt-get -yqq install libpq-dev build-essential libcurl4-openssl-dev
          gem install bundler
          bundle install --jobs 4
          yarn install
      - name: Setup databases
        run: |
          bin/rails db:setup
      - name: Run tests
        run: bin/rails test

  container:
    runs-on: ubuntu-latest
    needs: [tests]
    steps:
      - uses: actions/checkout@v2
      - name: Setup Google Cloud SDK
        uses: google-github-actions/setup-gcloud@master
        with:
          project_id: rails-gcloud-bookstore
          service_account_key: ${{ secrets.GCP_SA_KEY }}
          export_default_credentials: true
      - name: Install Google Cloud Docker
        run: gcloud components install docker-credential-gcr
      - name: Setup Docker for GCR
        run: gcloud auth configure-docker

      - name: Build Docker Image
        run: |
          echo ${{ secrets.RAILS_PRODUCTION_KEY }} > config/credentials/production.key
          docker build -t gcr.io/rails-gcloud-bookstore/bookstore:${{github.event.number}} .
      - name: Push Docker Image
        run: docker push gcr.io/rails-gcloud-bookstore/bookstore:${{github.event.number}}

  preview:
    runs-on: ubuntu-latest
    needs: [container]
    steps:
      - uses: actions/checkout@v2
      - name: Setup Google Cloud SDK
        uses: google-github-actions/setup-gcloud@master
        with:
          project_id: rails-gcloud-bookstore
          service_account_key: ${{ secrets.GCP_SA_KEY }}
          export_default_credentials: true
      - name: Get HEAD Commit Hash
        id: commit
        run: echo "::set-output name=hash::$(git rev-parse --short HEAD)"
      - name: Deploy Revision On Cloud Run
        run: |
          gcloud run deploy bookstore-preview \
          --image=gcr.io/rails-gcloud-bookstore/bookstore:${{github.event.number}} \
          --platform=managed \
          --port=3000 \
          --revision-suffix=${{github.event.number}}-${{steps.commit.outputs.hash}} \
          --add-cloudsql-instances=rails-gcloud-bookstore:europe-north1:bookstore-db  \
          --set-env-vars DATABASE_HOST=/cloudsql/rails-gcloud-bookstore:europe-north1:bookstore-db \
          --set-env-vars DATABASE_USERNAME='bookstore' \
          --set-env-vars DATABASE_PASSWORD='bookstore' \
          --set-env-vars DATABASE_NAME=bookstore_production_${{github.event.number}} \
          --set-env-vars RAILS_PRODUCTION_KEY=${{ secrets.RAILS_PRODUCTION_KEY }} \
          --allow-unauthenticated \
          --region=europe-north1
      - name: Update Traffic
        run: |
          gcloud components install beta
          gcloud beta run services update-traffic bookstore-preview \
            --update-tags pr-${{github.event.number}}=bookstore-preview-${{github.event.number}}-${{steps.commit.outputs.hash}} \
            --platform=managed \
            --region=europe-north1
      - name: Get Preview URL
        id: preview-url
        run: |
          url=$(gcloud run services describe bookstore-preview --format 'value(status.url)' --platform=managed --region=europe-north1 | sed 's|https://|https://pr-${{github.event.number}}---|g')
          echo "::set-output name=url::$url"
      - name: Post PR comment with preview deployment URL
        uses: mshick/add-pr-comment@v1
        env:
          GITHUB_TOKEN: ${{ secrets.GITHUB_TOKEN }}
        with:
          message: |
            Successfully deployed preview at ${{steps.preview-url.outputs.url}}
          allow-repeats: false
There’s a fair bit to unpack here, so let’s go over this step by step.
First, we need to define when our workflow should run. We want to deploy to our preview environment whenenver a pull request against our main branch is opened.
Furthermore, we want to do the same when a Pull Request is reopened or when new code is pushed to our pull request branch (which fires the synchronize event).
on:
  pull_request:
    branches:
      - "main"
    types: [synchronize, opened, reopened]
To specify what our workflow should actually do we define several jobs. Testing the application before doing a deployment is not strictly necessary, but it doesn’t hurt either. You don’t want to deploy broken code, even if it is just to a preview environment ![]()
tests:
  runs-on: ubuntu-latest
  env:
    RAILS_ENV: test
    DATABASE_HOST: localhost
    DATABASE_USERNAME: bookstore
    DATABASE_PASSWORD: bookstore
  services:
    postgres:
      image: postgres:13
      env:
        POSTGRES_PASSWORD: bookstore
        POSTGRES_USER: bookstore
      ports:
        - 5432:5432

  steps:
    - uses: actions/checkout@v2
    - name: Set up Ruby
      uses: ruby/setup-ruby@v1
      with:
        ruby-version: 3.0
        bundler-cache: true
    - name: Set up Node
      uses: actions/setup-node@v1
      with:
        node-version: 14.9
    - name: Install dependencies
      run: |
        sudo apt-get -yqq install libpq-dev build-essential libcurl4-openssl-dev
        gem install bundler
        bundle install --jobs 4
        yarn install
    - name: Setup databases
      run: |
        bin/rails db:setup
    - name: Run tests
      run: bin/rails test
We can then repeat the steps which we already performed locally - but with some twists. Our container build job depends on our test job, as we don’t want to run this step if the tests failed. We set up Google Cloud and authenticate with the service account we previously created, then build our image and push it to the Container Registry.
Note that we inject the production key into our image. We also tag the created image with the pull request number - this is important so we can deploy multiple pull requests side by side.
container:
  runs-on: ubuntu-latest
  needs: [tests]
  steps:
    - uses: actions/checkout@v2
    - name: Setup Google Cloud SDK
      uses: google-github-actions/setup-gcloud@master
      with:
        project_id: rails-gcloud-bookstore
        service_account_key: ${{ secrets.GCP_SA_KEY }}
        export_default_credentials: true
    - name: Install Google Cloud Docker
      run: gcloud components install docker-credential-gcr
    - name: Setup Docker for GCR
      run: gcloud auth configure-docker

    - name: Build Docker Image
      run: |
        echo ${{ secrets.RAILS_PRODUCTION_KEY }} > config/credentials/production.key
        docker build -t gcr.io/rails-gcloud-bookstore/bookstore:${{github.event.number}} .
    - name: Push Docker Image
      run: docker push gcr.io/rails-gcloud-bookstore/bookstore:${{github.event.number}}
Now we need to deploy our newly-created docker image. We won’t create a new service for each of our pull requests - instead, we’ll use revisions. Old revisions of Cloud Run services are automatically removed, which simplifies the clean up we’ll have to do when the pull request is closed.
However, we need some way to distinguish revisions and route traffic for the pull request to the most recent one - we’ll use the commit hash to identify those.
 - name: Get HEAD Commit Hash
    id: commit
    run: echo "::set-output name=hash::$(git rev-parse --short HEAD)"
Then we deploy the new revision. This command is similar to the one we used locally, with some minor changes.
- We use the image tagged with the pull request number
- We define a revision using
--revision-suffixthat contains the commit hash - We set the database name to include the PR number, so that pull requests use independent databases.
- We set the production master key using the previously created secret
- We configure the revision to not receive any traffic.
- name: Deploy Revision On Cloud Run
  run: |
    gcloud run deploy bookstore-preview \
    --image=gcr.io/rails-gcloud-bookstore/bookstore:${{github.event.number}} \
    --platform=managed \
    --port=3000 \
    --revision-suffix=pr-${{github.event.number}}-${{steps.commit.outputs.hash}} \
    --add-cloudsql-instances=rails-gcloud-bookstore:europe-north1:bookstore-db  \
    --set-env-vars DATABASE_HOST=/cloudsql/rails-gcloud-bookstore:europe-north1:bookstore-db \
    --set-env-vars DATABASE_USERNAME='bookstore' \
    --set-env-vars DATABASE_PASSWORD='bookstore' \
    --set-env-vars DATABASE_NAME=bookstore_production_${{github.event.number}} \
    --set-env-vars RAILS_PRODUCTION_KEY=${{ secrets.RAILS_PRODUCTION_KEY }} \
    --allow-unauthenticated \
    --region=europe-north1
We have created a new revision of our bookstore service serving the code from our pull request. Now we only need to make sure the revision is easily reachable. We can accomplish this using the update-traffic command.
Setting a tag allows us to reach to revision we created using some prefix. Assuming a base URL for accessing the bookstore application that looks like https://bookstore-abcd12345-ab.a.run.app and a tag pr-1234 the revision can be reached under https://pr-1234---bookstore-abcd12345-ab.a.run.app.
- name: Update Traffic
  run: |
    gcloud components install beta
    gcloud beta run services update-traffic bookstore-preview \
      --update-tags pr-${{github.event.number}}=bookstore-preview-${{github.event.number}}-${{steps.commit.outputs.hash}} \
      --platform=managed \
      --region=europe-north1
Last but not least, let’s post a comment to our PR which contains the link to the preview environment. We can retrieve the base URL of our bookstore service and change it to include the tag we previously set. Once we have that, we use the add-pr-comment action to post the comment.
- name: Get Preview URL
  id: preview-url
  run: |
    url=$(gcloud run services describe bookstore-preview --format 'value(status.url)' --platform=managed --region=europe-north1 | sed 's|https://|https://pr-${{github.event.number}}---|g')
    echo "::set-output name=url::$url"
- name: Post PR comment with preview deployment URL
  uses: mshick/add-pr-comment@v1
  env:
    GITHUB_TOKEN: ${{ secrets.GITHUB_TOKEN }}
  with:
    message: |
      Successfully deployed preview at ${{steps.preview-url.outputs.url}}
    allow-repeats: false
Add your GitHub repository as remote for your application and push your local changes.
git remote add origin [email protected]:<your-repository-url>
git add . && git commit -m 'Add pull request reviews'
git push --set-upstream origin master
Opening a pull request should execute the GitHub workflow we defined. Congratulations for making it all the way! ![]()
Closing
I hope this guide has given you a rough idea of how Cloud Run and GitHub Actions can be leveraged to create preview deployments for your pull requests.
I took a lot of inspiration from other posts - big shout out to @MaximeHeckel whose in depth post helped me out a lot.
Building on existing solutions to make them work even for a simple Rails application was a nice challenge, and I had a lot of fun working on this. That being said, I’m aware that there is a lot of potential for improving the current solution.
We haven’t taken care of cleaning up after us at all. Right now each pull request creates a new database in our Cloud SQL instance. Both the GitHub Action as well as the container build can be made a lot more performant.
And of course, you can increase the complexity of the base application. How does this solution behave when using ActiveStorage? How can we deal with dependencies to other services, like an internal authentication service? The list goes on and on.
But this guide is long enough as it is.
I leave the rest for you to explore ![]()